
Date Added: 14 May 2025
Wandering Princess
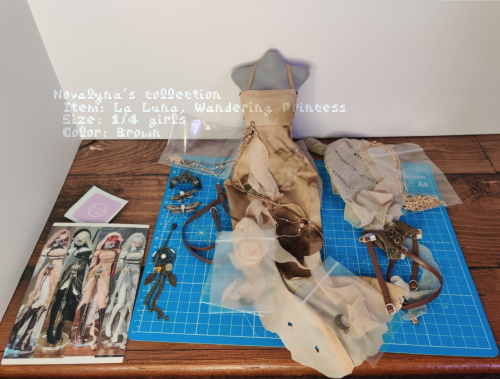
I purchased this gorgeous La Luna outfit set via Space Studio. It was released in 4 colors: Brown (this one), Black, Apricot, and Silver. The fabric of the dress ended up being changed from the prototype, which is more stretchy and thus emphasizes the tatas, but I don't mind it. A note to those with smell sensitivities: La Luna included a scented packet in the box. I can only smell it when held up the packet to my nose, and although it's labeled "Lavender" it smells like laundry detergent, but still something to watch out for if you have a sensitivity to lavender, soapy smells, or scented items in general.
- ♡ Dress on a 3d printed dress form
- ♡ Hooded vest
- ♡ Pair of knitted sleeves
- ♡ 2 painted resin moths
- ♡ Painted resin mask
- ♡ 3 belts (1 for the chest, 2 for the arms)
- ♡ Dreamcatcher pendant
- ♡ Image card
- ♡ Instructions
- ♡ Eye putty
- ♡ Clear elastic hair ties
- ♡ Scented packet
What's in the box?

As a master of putting things on upside-down and backwards (thanks asigmatism, myopia, and aphantasia) I am so grateful to have INSTRUCTIONS! =^_^= It's so hard to wear some of these outfits when they don't even include a photo card, but La Luna gave both. First, I'll give the translation of the instructions, then the full step-by-step on how I put on the full outfit.
Things to note while wearing the dress:
- ♡ After adjusting the height of the chest, hold it with your hands before putting on the ribbon to prevent the collar height from slipping and needing to be readjusted.
- ♡ It is recommended to put a chain around the back. It will be more beautiful.
- ♡ Put on the clothes and fix the straps before opening the bags around the accessories so they don't get tangled.
Things to note when wearing the hat (the hooded vest):
- 1. Put on the dress before the hat
- 2. How to wear:
- ♡ Open the velcro at the collarbone.
- ♡ The belt in front goes around the back.
- ♡ The belt in back goes around the front.
- 3. The lobster clasp on the hat chain can be fastened to the knitted fabric of the sleeves.
- ♡ When putting on the hat, the chain will most likely have fallen to the side and need to be straightened.
- ♡ The center point is where the chain is sewn into place. Both sides of the chain are symmetrical.
- ♡ If you don't want the fabric around the hood to be fluffy, use the chain to weigh it down.
Now, let's get dressed!
Time to get dressed, featuring my Myou Chelses, Doraeli. Note that chains on the dress and hat have bags around them. You should keep them on until you're at the appropriate part of dressing so they won't get tangled up.
- 1. Pull the ribbons of the dress loose and open velcro at the back of the dress. Remove the 3d printed dress form.
- 2. Slip the doll into the dress, taking care that you have one chain going around the back (it was already like this on the dress form), and that the fabric tendril that crosses in front of the dress doesn't get stuck behind either of her legs.
- 3. Close the velcro in the back of the dress. Hold the chest area with your hand at the desired height, and get the top of the ribbons in place. Then finish lacing the back.
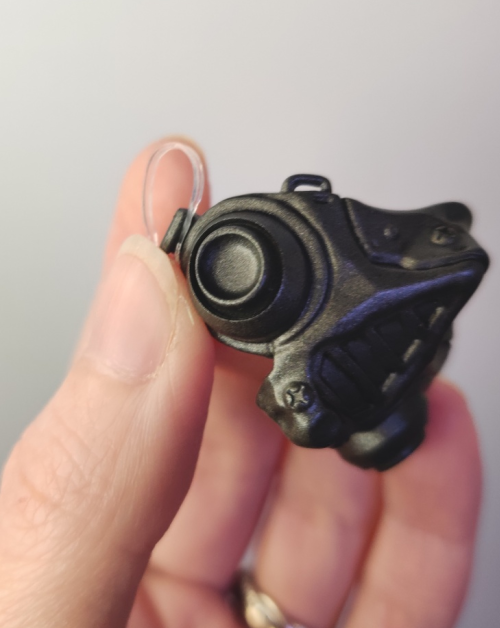
- 4. Put the mask on your doll's face if desired. I didn't want to wear it but I did test how to put it on. There is a curved part on either side of the mask shown here. You loop the clear elastic hair ties to this little hook and then pull around each ear. I put a little fabric scrap in between because I was worried about scratching the face up... I suppose you could also have padded it with the included putty.
- 5. Put on the hooded vest by opening the velcro in front. Connect the front belts behind her back, and the back belts under her bust.
- 6. Put the longest loose belt beneath the under bust belt with the buckle facing in front.
- 7. Put on the sleeves. The wider opening should end up at the wrist. Because it's distressed-look knit, there are a lot of holes for little dolly fingers to get stucky, so I recommend using dressing paddles or alternate hands where the fingers are not splayed, such as fist or praying hands. It's stretchy, so it should fit over with a little patience if you don't have any of these.
- 8. Put a small belt above the sleeve on each arm.
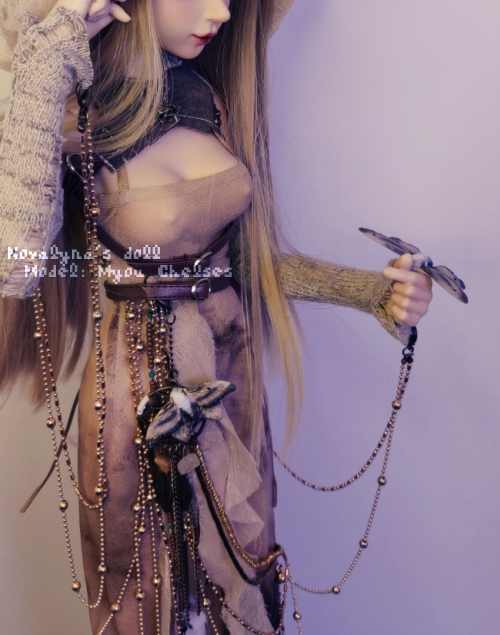
- 9. Put the wig on if you have removed it for dressing. Pull the hood over the top of her head. With the chain still in the bag, start to pull up the chain until you find the center point. Hold this point in place with one hand and pull out the rest of the chains with the other, sorting them so they lay symmetrically. The chains can hang or be clasped to the sleeves (or any other part of the dress I suppose). I hooked mine to the wrist area to form an arc following her arms. Adjust the position of the chains on top to shape the front of the hood to your liking.
- 10. Clip on the dreamcatcher pendant to a metal hoop above where the other dress chains are fixed. It's right by the underbust belts.
- 11. Remove the bags protecting the dress chains and tendrils. Use the charms to place the tendrils how you want.
- 12. Fix the resin moths where you desired using the provided eye putty. On the image card, the big moth is fixed to the resin mask or the face (but I put it on her hand). And the small moth is fixed on the dreamcatcher.
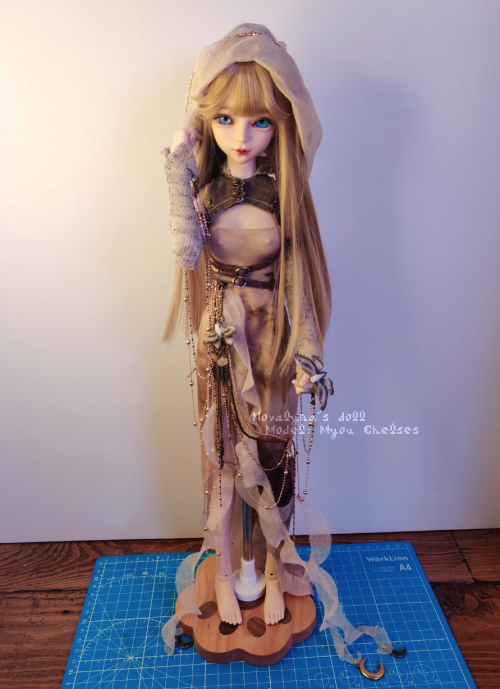
All done!
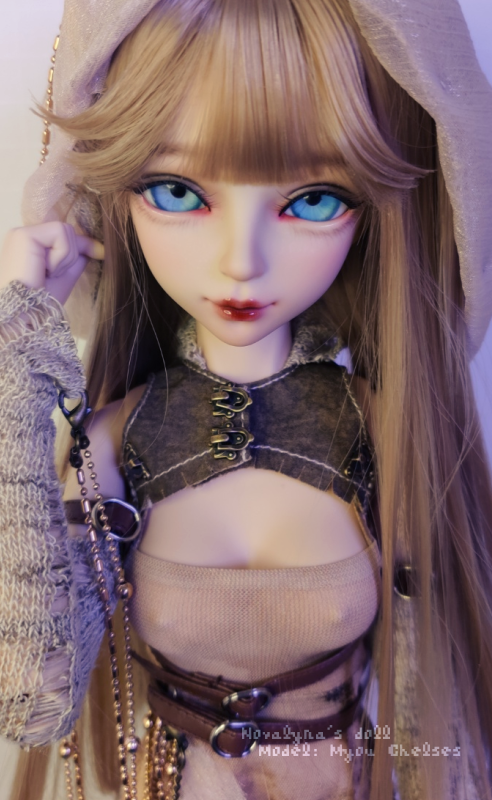

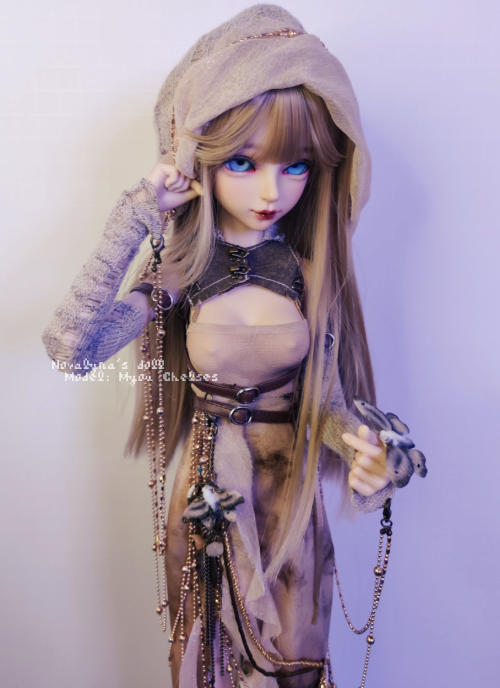
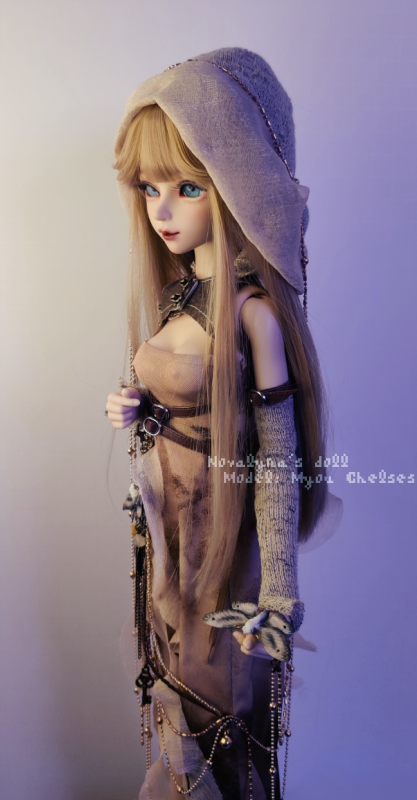
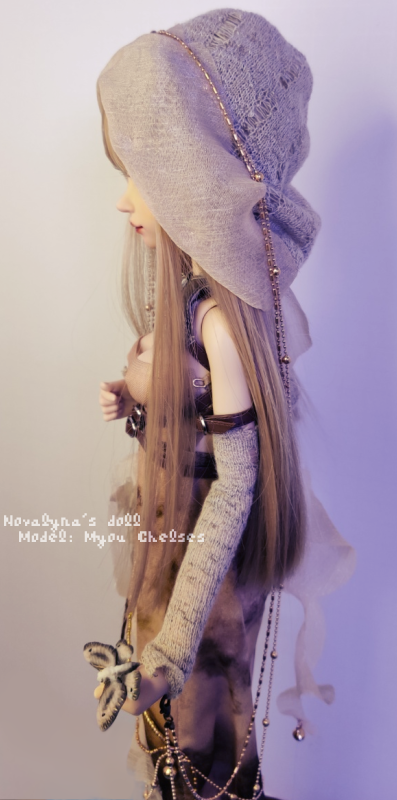
All in all, I love this set. It wasn't intended for Doraeli, but doesn't she look precious in it?! I especially love the little tendrils and chains. This outfit would be so perfect for a shoot out in nature.
Hope this was helpful~
Novalyna